Beginners Guide to Chatbots Development & Integration using Dialog flow
Hey Guys! This is a basic tutorial on how to make AI Chatbots and integrate it in your website using Dialog flow. I’ll be showing you all how step by step you can make your own Chatbot and integrate it into your own website using Dialog flow(Google’s Product). I’ll be guiding you all on how you can step by step make your own Chatbot.

Step -1 : First of all open you Internet Browser(any) and open Dialog Flow website

Step -2: Then Click on “Go to Console” or “Sign in” to Proceed further. You will be asked for your Google Sign in credentials and some permissions, accept them and go ahead.
Step -3: After you have completed all Sign in procedures you will be prompted to a Console welcoming you.
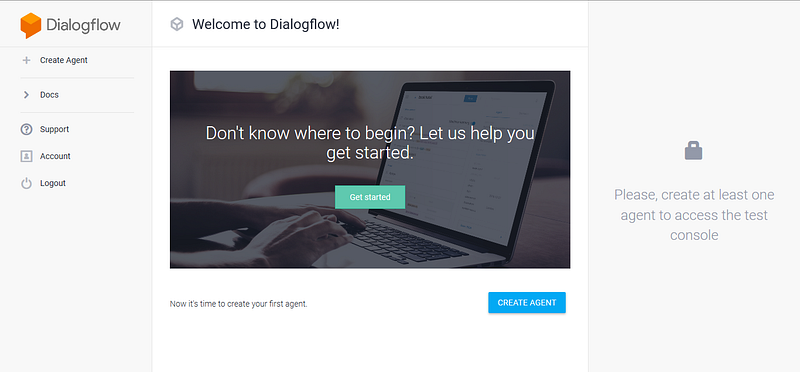
Step -4: Now Click on “Create Agent” to create your Chatbot agent with Agent Name and Preferred Language and Click on Create Button

After a while your agent will be created you will be redirected to “Intents” section. Intents are mappings between a user’s queries and actions fulfilled by your software. They can also be imagined as placeholders of default response for user’s queries. Verify that you are on this screen.
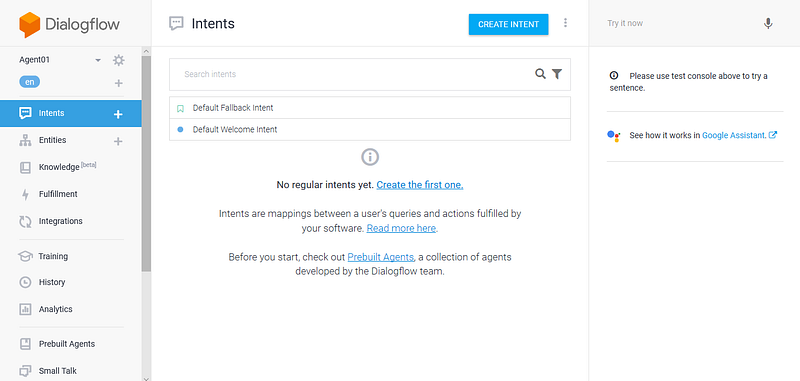
IMPORTANT : Now Since we are going to implement the Welcome intent such as “hello”, ”Hi”, please first delete the “Default Welcome Intent” from the Intent’s section above otherwise you will face problems.
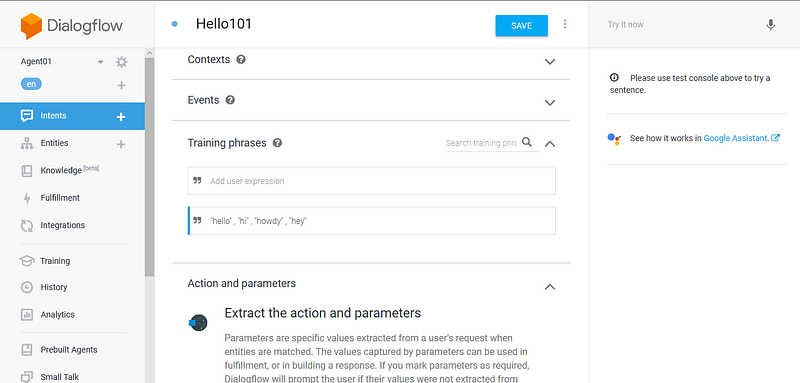
Step -5: Now Click on “Create Intent” to create the mapping and give it a name (any) and then go to Training phases section when creating or after creating intent and add phrases that you want your user’s to ask with inverted commas separating them with commas and many similar words that mean the same. For example, in my case is “hello”, “hey” , “howdy” , “hi” and then press enter.
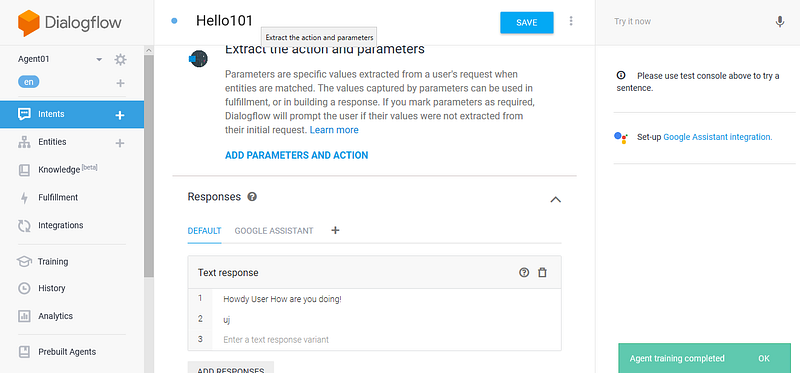
Step -6: Now scroll down and head over to “Responses” section and then Click on “Add Response” and then enter the Text Response you want your User to give in response to the Training phrases. For example, in my case I’ve added “Howdy User How are you doing!” as a default response. You can add multiple responses to the Queries.

You can also integrate your Chatbot with Google assistant by clicking on the “+” icon after the “DEFAULT” response column and add Google assistant. In this way you can also see how your chatbot works with Google assistant.
Step -7: Now Click on the “SAVE” button at the top to start the Agent Training and wait till it prompts below as “Agent Training Completed”
Step -8: Now Click on Try it Now at the Right corner and type your Training query and see if the response is that of the Text response. If yes,then congrats you’ve trained your First Training phrase. You can make more Intents and add more training phrases and action to it similarly.
If you don’t want to make every custom Training phrase then use “Small Talk” section available at left top menu of Dialog Flow Console. Your agent can learn how to support small talk without any extra development. By default, it will respond with predefined phrases. Use the form below to customize responses to the most popular requests.

There are more sections available such as actions and Context, feel free to discover them. You can also use pre-built agents for your common use and integrate it into your Chatbot. See Pre-built agents in the left menu
Step -9: Now it’s Integration time. Click on the left menu tab named as “Integrations”. You can see multiple Integration apps in it. Switch on “Web Demo” from it You will be prompted to this screen after enabling it.
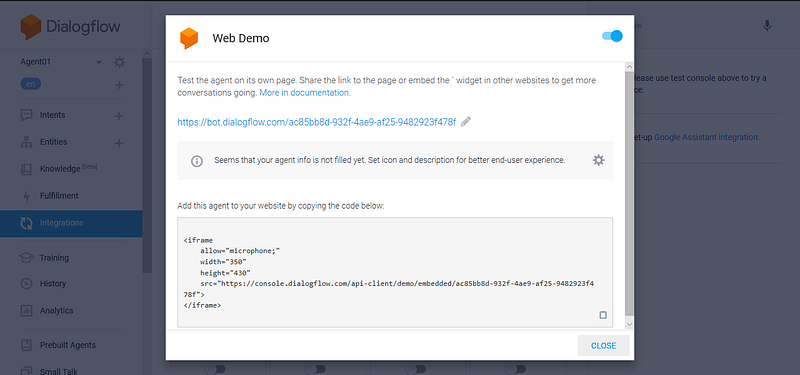
Now copy the iframe code below and paste it into your website code and you’ll see the Chatbot working…
Comments
Post a Comment